Getting Started
Quickstart
Requirements
- Java 8+
- Java app server (Tomcat, Jetty, etc) [Optional]
Running via Spring Boot
- Download WAR file (Binary packages are available for macOS, Windows, and Linux platforms on the releases page. )
- Run
java -jar cakeshop.war - Navigate to http://localhost:8080/
Note: when running in Windows, -Dgeth.node=geth must be specified as Quorum is not yet available on Windows OS
Running via App Server
- Download WAR file
- Put in
/webappsfolder of your app server - Add Java system property
-Dspring.profiles.active=localto startup script (setenv.shfor tomcat) - Start app server
- Navigate to http://localhost:8080/ (default port is usually 8080)
Note: when running in Windows, -Dgeth.node=geth must be specified as Quorum is not yet available on Windows OS
Running modes
There are a few ways in which you can run Cakeshop (see the sections below for details on each, as well as configuration page):
1. Default mode: Used when you want Cakeshop to start up an Ethereum node.
Running Cakeshop in the Default mode will start up Cakeshop and also start running a regular geth node (on a private/test network).
2. ‘Attach/Unmanaged’ mode: Used when you want to attach Cakeshop to an already running Ethereum-like node.
Running Cakeshop in ‘Attach’ a.k.a ‘unmanaged’ mode will initialize Cakeshop but not start it nor start any Ethereum node. Once Cakeshop initialization is complete you can configure it to use the RPC details of your running node . When you then start Cakeshop it will attach to your node.
NOTE: if different parties on the network are using Cakeshop to deploy contracts to the network then they need to ensure they are using the same ContractRegistry address. See details below for setting up the ContractRegistry address in this case.
3. Multi-Instance Set Up: Used when you want to run Cakeshop on more than one node in your network.
Cakeshop is currently designed such that a given instance of Cakeshop works directly with a single Ethereum-like node, however you can set up multiple instances of Cakeshop on the same machine (each which could either have been started in ‘Default’ mode or ‘Attach’ mode) such that each can talk to a different node.
NOTE: you can use the Attach mode and/or Multi-Instance setup configuration to run Cakeshop on Quorum nodes. See below for connecting Cakeshop to the 7nodes network from the quorum-examples repo.
The below commands assume you have renamed the WAR file to cakeshop.war
Default Mode
-
In a terminal window run:
$ cd path/to/cakeshop/war $ java -jar cakeshop.war -
Open http://localhost:8080/ in your browser (Firefox/Chrome supported)
Attach Mode
-
In a terminal window run:
$ cd path/to/cakeshop/war
# The 'example' arg below will unpack the war file and set up the cakeshop data folders but will not actually start a node
$ java -jar cakeshop.war example
-
Navigate to path/to/cakeshop/war/data/local
-
Make the following edits to the application.properties file:
geth.auto.start=false
geth.auto.stop=false
-
Run:
$ java -jar cakeshop.war
-
Open http://localhost:8080/ in your browser (Firefox/Chrome supported)
-
The dropdown menu on the top right of the page should show “Manage Nodes” if you haven’t attached to any yet. Click on that to go to the Manage Nodes page.
-
Click Add Node and input the RPC url of your Quorum node (i.e. http://localhost:22000) and the path to the Tessera P2P Party Info endpoint (i.e. http://localhost:9001/partyinfo).
-
Once added, click on View to attach to the node and return to the main Cakeshop page
Multi-Instance Setup
Although Cakeshop currently has a one-to-one mapping with the underlying Ethereum-like node that it connects to, it is possible to have multiple Cakeshop instances running on the same machine, each connecting to a different Ethereum-like node. The best way to achieve this is to create separate Cakeshop folders for each node and then attach to each separately. You should also configure the ContractRegistry address as per the below:
** Cakeshop ContractRegistry contract**
Cakeshop deploys a ContractRegistry contract upon start up that is used to track those contracts that have been deployed to the chain using Cakeshop or the Cakeshop APIs. When running a multi-instance setup, you’ll want to ensure that each instance of Cakeshop references the same ContractRegistry contract in order that each provides a consistent view within the Contracts Explorer.
There are two cmd flags that can be set to achieve this:
CAKESHOP_SHARED_CONFIG(recommended): When this flag is set, Cakeshop will try to load a file called ‘shared.properties’ and read the ContractRegistry address from it. If the file doesn’t exist, Cakeshop will deploy the ContractRegistry contract, create this file and store the address in the file.USAGE:
$ CAKESHOP_SHARED_CONFIG="{fileLocation}" java -jar cakeshop.war
CAKESHOP_REGISTRY_ADDR: This flag will directly override whatever ContractRegistry address is configured (or not) and run with that address. Using this flag doesn’t change any local Cakeshop settings nor save this address to file and so you would have to run with this flag again to use this address again.USAGE:
$ CAKESHOP_REGISTRY_ADDR="0xabcdefgh.." java -jar cakeshop.war
-
In terminal window 1 run:
mkdir myNetwork && cd myNetwork
cp path/to/cakeshop/download /myNetwork
cd myNetwork
mkdir node1 node2
cd node1
CAKESHOP_SHARED_CONFIG=".." java -jar ../cakeshop.war example
-
Assuming you want to attach to an existing node, navigate to /myNetwork/node1/ and edit application.properties per the instructions for attach mode as described above
-
In terminal window 2 run:
cd myNetwork/node2
CAKESHOP_SHARED_CONFIG=".." java -jar ../cakeshop.war example
-
Navigate to myNetwork/node2 and edit application.properties per the instructions for attach mode as described above
-
In terminal window 1 run:
CAKESHOP_SHARED_CONFIG=".." java -jar ../cakeshop.war
-
In terminal window 2 run:
CAKESHOP_SHARED_CONFIG=".." java -Dserver.port=8081 -jar cakeshop.war # Cakeshop will now be available on localhost:8081
-
In browser window 1 open http://localhost:8080/
-
In browser window 2 open http://localhost:8081/
Running Cakeshop on quorum-examples
You can use the ‘Attach’ mode to use Cakeshop to explore the quorum-examples 7nodes network.
To do so:
- Follow the instructions in the 7nodes example to start the 7nodes network (running vagrant up, init.sh, start.sh etc.)
- Follow the instructions listed under the Attach mode as described above, using the
rpcportof the node you want to explore as found in the 7nodes start.sh file. Equally, follow the Multi-Instance setup to attach to more than one of the Quorum nodes.
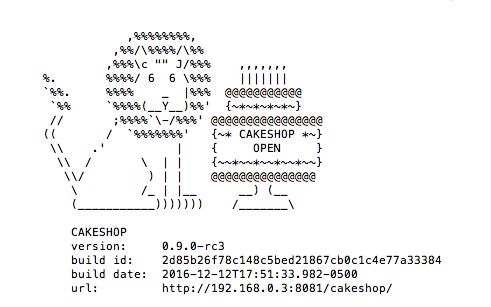
Confirming Cakeshop Start Up
In all cases, Cakeshop will be running once you see the below image, which shows the Cakeshop build and url that you can access that instance of Cakeshop on: